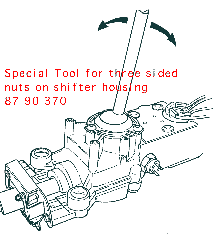
Depending on the year there are several different procedures for adjusting the shifter positions. Also, there are several special tools suggested to ease these adjustments. They are not necessary however, really just make life simpler. The special tools to lock the shift shaft in place can be eliminated if after loosening the pinch bolt on the shaft, you give the tranny end of the shaft a little push just to insure it is all the way engaged. For the special three sided nuts, you can use a hammer and punch to loosen them and then replace them with standard hex nuts. Or you can manufacture a tool for them by grinding down an 11 mm socket. In all cases, you must remove the center console to get to the shifter housing. It is a real good idea to go ahead and loosen the three screws holding the actual shifter in place and clean and relube the assembly there.
1980-1982.5

Lock the selector in reverse by removing the key. Check that the shifter has free play forward and backwards, There should be 3-4 mm of movement, equal in fore to aft. If it is unequal, loosen the three sided nuts and move the housing until it is.
1982.5-1986.5
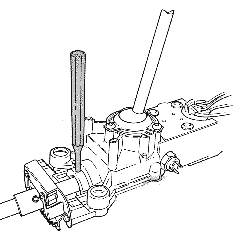
Note the easy way to tell the production change in the adjustment procedure, the newer style has a hole in the shifter housing for the 6 mm punch/drift. To adjust, select reverse gear, loosen the pinch bolt on the shift shaft in the engine compartment above the power steering rack. Then get in the car and move the shifter until the 6 mm drift will go through the hole in the housing and the shaft. Leave it here with the drift to lock it in place. Go back to the pinch bolt and after checking that the tranny end of the shaft is still in reverse, tighten the pinch bolt.
1986.5 on
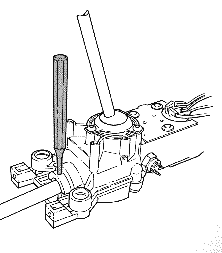
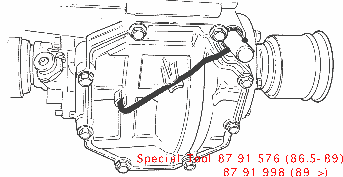
The procedure here is similar to above except third gear is selected. Also note these cars do not have the external centering blocks. The centering function is moved internally to the transmission. Also note the slots in the differential cover to accommodate the special tool to lock the tranny shift shaft in place. Select third gear, loosen the pinch bolt, giving the tranny shaft a little pull to make sure it is all the way in third and then move the shifter so that the 6 mm drift can be inserted through the hole in the housing into the shaft at the console. Then tighten the pinch bolt.
The center console must be removed on a 9000 as well. make sure you check the rubber shift coupling at the junction of the shift shaft from inside the car and the one going in to the tranny, located just above the power steering rack on the left side of the engine compartment best accessed from below. Watch the coupling as someone moves the shifter from the 1-2 gate to the 5-R gate. if the coupling has a problem, you will see the shaft from inside the car turn more than the shaft going into the tranny. You may be able to see the coupling separate. These rubber bits often break between the two metal pieces and the rubber. Result is a sudden inability to get either 1&2 or 5&R as the coupling separates instead of turning the tranny shift shaft. These rubber bits are available separately. A good emergency fix is to use two common hose clamps around each end of the coupling clamping the shafts together.
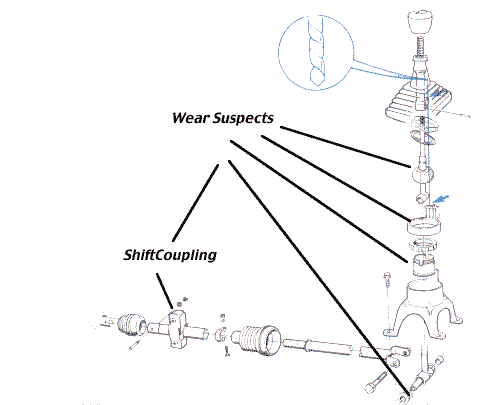
Make sure the tapered pin and its nut in front of the coupling is tight.
If the coupling is fine, you can make sure the adjustment of the shifter is fine by removing the center console rubber boot and selecting reverse gear. insert a 4 mm drill bit through the plastic on the housing and into the shaft to lock it in place. Loosen the pinch bolt on the shift shaft just in front of the coupling and push the tranny side firmly in place. Tighten the pinch bolt.
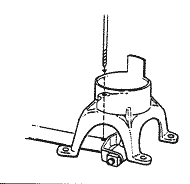
Check the coupler and tapered pins as described above for the 9000. Same things apply.
Select 4th gear. Remove the plastic plug in the gearbox (#2 in pic below) Insert the tool ( 8792335) (Or a 6 mm drill bit (but use a pair of vise grips on the bit to prevent it from falling into the gearbox)) to lock the tranny in 4th.
Remove the rubber boot on the shifter at the console. (#3 in pic) if the drill bit inserts easily into the hole engaging the shaft, no adjustment is necessary.
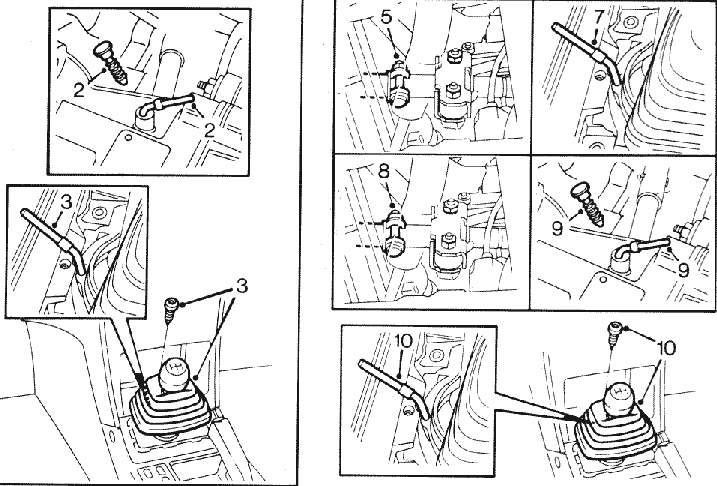
if adjustment is necessary, select 4th and install the tool in the gearbox hole. Loosen the pinch bolt and then move the shifter until the drill bit can be inserted in the shifter housing. Tighten the pinch bolt. Recheck that in 4th, the drill bit goes easily into both the hole at the tranny and at the shifter.